
Most people get arm tracking completely wrong from day one. They wrap a tape measure around their bicep every Monday morning, watch the numbers bounce around randomly, and wonder why nothing makes sense.
The problem has nothing to do with their training or genetics.
They’re measuring noise instead of signal.
Your arm circumference can fluctuate by half an inch or more within a single day. Hydration status changes measurements.
Salty food from last night changes measurements.
How recently you trained changes measurements. Even stress hormones affecting water retention change measurements.
When you measure your right arm one week and left arm the next, or when you measure at different spots on your arm, or when you measure after training versus first thing in the morning, you’re generating random data that tells you absolutely nothing useful about actual muscle development.
What genuinely matters is establishing a standardized protocol and sticking to it religiously. Same arm, same location, same time of day, same conditions every single time.
Only then does the data become meaningful enough to guide your training decisions.
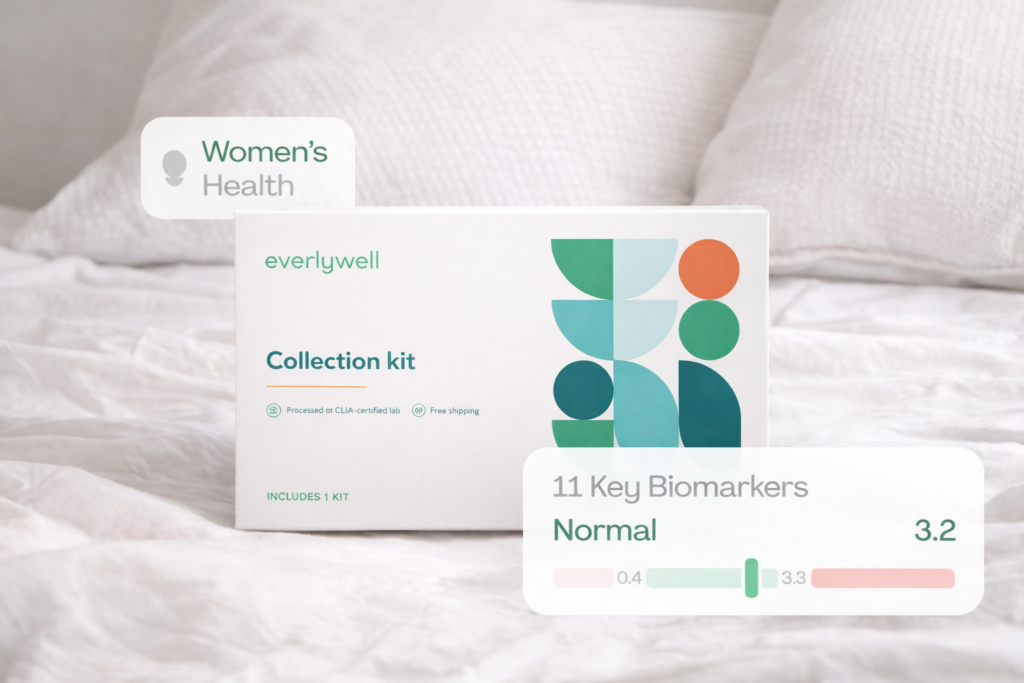
Everlywell Cholesterol & Lipids Test – At-Home Screening
Want to monitor your heart health and lipid levels without a lab visit? This at-home test provides a comprehensive look at key cholesterol markers so you can better understand your cardiovascular risk.
- ✔ Measures total cholesterol, LDL, HDL, and triglycerides
- ✔ CLIA-certified lab analysis
- ✔ Physician-reviewed, easy-to-read results
- ✔ Simple finger-prick blood sample from home
FSA/HSA eligible • Test from home • Personalized cardiovascular insights
Setting Up Your Measurement System
The foundation of effective arm tracking starts with proper measurement technique. You need a soft fabric measuring tape, not the metal kind used for construction.
The soft tape conforms to your arm’s shape without creating uncomfortable pressure that compresses tissue and skews measurements.
For bicep measurements, find the peak of your muscle when fully flexed. Stand naturally, flex your bicep hard, and identify where the muscle reaches its highest point. This typically sits about midway between your elbow and shoulder, but varies based on individual muscle bellies.
Mark this spot mentally or even with a small washable marker if you’re serious about precision.
The tape should wrap around this peak, sitting parallel to the ground, with just enough tension to stay in place without digging into the skin.
Forearm measurements work differently because you’re not flexing maximally. Measure at the widest point of your forearm, typically about an inch or two below the elbow when your arm is relaxed and hanging naturally.
Again, the tape stays parallel to the ground with minimal tension.
Timing matters enormously. I recommend measuring first thing in the morning, post-bathroom but pre-breakfast.
Your hydration levels are most consistent at this time, you haven’t eaten anything that might cause temporary bloating, and you’re several days removed from your last arm workout so there’s no residual pump affecting the numbers.
This becomes your structural baseline measurement that reflects actual tissue changes as opposed to temporary inflammation or blood flow.
Some people prefer measuring with a pump immediately after training. That’s fine if you stay consistent with it, but understand you’re tracking a different metric.
Post-workout measurements show your most achievable circumference under ideal conditions, which can be motivating, but they also vary more wildly based on workout intensity, fatigue levels, and nutrition timing.
I find cold measurements more reliable for tracking actual growth.
Understanding What Numbers Actually Mean
Not all measurement increases represent progress, and not all plateaus represent stagnation. If your arms grow half an inch while you simultaneously gain ten pounds of body weight, that measurement increase might include significant fat accumulation as opposed to pure muscle development.
Conversely, if your measurements stay exactly the same while you lose five pounds of body weight, you’ve actually achieved remarkable muscle preservation or even growth during a fat loss phase.
This is precisely why you need to track arm measurements alongside body weight and ideally some form of body composition assessment. Even something as simple as waist circumference gives you context.
If your arms are growing and your waist is shrinking, that’s extremely clean muscle development.
If both are growing proportionally, you’re probably in an effective bulking phase. If your waist grows faster than your arms, you’re getting fat with some muscle as a side effect.
The rate of arm growth tells you a lot about where you are in your training career. Complete beginners can genuinely add half an inch per month for the first few months through a combination of muscle growth, improved glycogen storage, and enhanced neuromuscular efficiency.
Intermediate lifters might see half an inch every three to six months.
Advanced lifters who’ve been training seriously for years might celebrate a quarter inch annually. These aren’t failures of training intensity.
They’re natural consequences of approaching your genetic potential.
Understanding these timelines prevents unnecessary panic when growth slows down. I’ve watched so many intermediate lifters abandon perfectly good training programs after six weeks without measurement changes, not realizing that their current stage needs three to four months to show visible progress.
Patience combined with consistent execution beats program hopping every single time.
Building Your Training Log
Raw measurements without training context are nearly useless for optimization. You need to know what you were doing during periods when your arms grew versus periods when they stagnated. This means maintaining a detailed training log that captures not just exercises and weights, but the variables that actually drive hypertrophy.
At least, log every arm workout with specific exercises performed, sets completed, reps achieved, and weights lifted. But the real value comes from tracking intensity markers. Rate of Perceived Exertion on a scale from one to ten tells you how hard each set felt.
A consistent RPE of seven to eight tends to drive the best hypertrophy without accumulating excessive fatigue.
If you’re always training at RPE nine to ten, you’re probably compromising recovery. If you’re consistently at RPE five to six, you’re likely leaving gains on the table.
Rest periods between sets matter more than most people realize. Tracking that you performed four sets of barbell curls with fifty pounds for ten reps doesn’t tell the whole story if you took four-minute rest breaks versus ninety seconds.
The shorter rest creates greater metabolic stress and different adaptations.
You don’t need to be obsessive about this, but noting whether rest was short (under ninety seconds), moderate (ninety seconds to two and a half minutes), or long (over three minutes) provides useful context.
Volume load calculation gives you the most comprehensive single metric for tracking training stimulus. Multiply sets times reps times weight for each exercise, then sum across your entire arm workout.
If you did three sets of ten reps with thirty-pound dumbbells for curls, that’s nine hundred volume load just for that exercise.
Track total session volume load over time, and you’ll likely see a strong correlation between periods of increasing volume and periods of arm growth.
I also recommend tracking exercise form notes. If you performed hammer curls but felt them primarily in your forearms as opposed to biceps, note that.
If skull crushers caused elbow discomfort, note that.
These qualitative observations help you identify which movements work best for your individual biomechanics and which ones you should probably replace.
Progress Photos and Visual Assessment
Numbers tell part of the story, but visual documentation captures changes that circumference measurements completely miss. You can maintain identical arm measurements while dramatically improving muscle definition, vascularity, and overall shape as body fat decreases.
Progress photos document these qualitative improvements that keep you motivated when quantitative measurements plateau.
Standardization matters just as much for photos as for measurements. Choose a specific location with consistent lighting.
Natural light from a window works beautifully, but artificial lighting is fine if it’s always the same.
Take photos from the same angles: front double bicep, side relaxed, back double bicep at least. Wear the same clothing or no shirt to eliminate fabric inconsistencies.
Most importantly, take photos at the same time relative to training.
I prefer photos on rest days, first thing in the morning, to capture your arms without any pump or fatigue.
Monthly photo intervals work well for most people. Weekly photos create unnecessary anxiety because changes are too subtle to notice, while quarterly photos miss the motivational benefit of seeing incremental progress.
Set a calendar reminder for the same day each month, take your standardized photos, and store them in a dedicated folder with clear date labels.
When reviewing photo progressions, look beyond just size. Notice whether veins become more prominent, whether muscle separation improves between bicep and tricep heads, whether the peak of your bicep becomes more pronounced, and whether your forearms show more definition.
These visual markers often improve before circumference measurements change, providing leading indicators that your training approach is working.
Tracking Arm Symmetry and Imbalances
Most people have one arm that’s legitimately stronger and slightly larger than the other, typically the dominant side. Small differences of a quarter inch are completely normal and nothing to worry about.
However, gaps exceeding half an inch show genuine imbalances that can affect both aesthetics and injury risk.
Measure both arms separately every time you take measurements. Track the absolute difference between them over time.
The goal involves preventing the gap from widening as opposed to necessarily achieving perfect symmetry.
If your imbalance is narrowing gradually, your training approach is addressing it. If the gap widens, you need corrective work.
The most effective correction strategy involves unilateral exercises where each arm works independently. Cable curls, dumbbell work, and single-arm movements prevent your stronger side from compensating for your weaker side.
During these exercises, always start with your weaker arm, perform a set, then match that exact rep count with your stronger arm even if it could do more.
This gradually allows the weaker side to catch up without letting the stronger side pull further ahead.
Grip strength often correlates with forearm development but can also reveal hidden imbalances. If you notice one forearm is significantly smaller, test grip strength on both sides.
Chances are you’ll find the smaller forearm has weaker grip, suggesting that grip-intensive exercises might be biased toward your stronger side.
Incorporating specific grip work like farmers carries with unilateral loading helps address this root cause.
Performance Metrics as Leading Indicators
Circumference measurements lag behind actual adaptation. Your muscles get stronger and more capable before they get noticeably larger.
This is why performance tracking provides early confirmation that your training is working, even during frustrating measurement plateaus.
Establish benchmark exercises that you test periodically. For biceps, barbell curls or dumbbell curls work well.
For triceps, close-grip bench press or overhead extensions.
For forearms, wrist curls or dead hangs. Every four to six weeks, test your most reps at a specific weight for these movements.
Increasing from twelve reps to fifteen reps at the same weight represents genuine strength adaptation that will eventually translate to size increases.
Another valuable metric is rest interval needs. If you previously needed two and a half minutes between sets to maintain performance, but now you only need two minutes between sets while hitting the same reps and weight, your work capacity has improved. This enhanced recovery between sets shows cardiovascular and muscular adaptations that support further growth.
Time under tension per session reveals whether you’re accumulating enough stimulus volume. Count the total seconds your muscles are actually working during each session.
A typical hypertrophy-focused arm workout might accumulate three to five minutes of total time under tension.
If you’re consistently below two minutes, you’re probably not doing enough total work. If you’re exceeding seven minutes, you might be accumulating excessive fatigue that compromises recovery.
Adjusting Training Based on Tracking Data
The entire purpose of meticulous tracking is generating actionable insights that improve your training decisions. When you have months of data correlating specific training approaches with measurement outcomes, you can identify what actually works for your individual response patterns.
If your best measurement gains coincided with periods of high-volume training using moderate weights and higher rep ranges, that suggests you’re a volume responder who should prioritize accumulating total work. If your best gains came during strength-focused phases with heavier weights and lower reps, you respond better to mechanical tension.
Most people fall somewhere in between, but your personal data reveals your specific bias.
Exercise selection analysis over time shows which movements drive your best development. Perhaps your arms grew most during a phase when you emphasized hammer curls and overhead tricep extensions.
Perhaps concentration curls and rope pushdowns correlate with your measurement plateaus.
This doesn’t necessarily mean certain exercises are universally superior, but it shows which ones work best for your individual biomechanics and muscle fiber recruitment patterns.
Training frequency decisions should be informed by your recovery tracking and measurement trends. If switching from training arms once per week to twice per week coincided with accelerated growth, you’ve found your optimal frequency.
If going from twice to three times weekly led to measurements stagnating despite increased effort, you’ve exceeded your recovery capacity.
People Also Asked
How often should I measure my arms for muscle growth?
Measure your arms once per month using standardized conditions. Monthly measurements provide enough frequency to track trends without creating anxiety over meaningless daily fluctuations.
Always measure at the same time of day, preferably first thing in the morning before eating, and several days after your last arm workout to avoid pump-related inflation.
What is a good bicep size for my height?
Bicep size varies dramatically based on bone structure, arm length, and overall frame size, making height-based standards largely meaningless. Focus on your personal progression as opposed to comparing to arbitrary charts.
If your arms are growing consistently relative to your own baseline while maintaining proportion with the rest of your physique, you’re on the right track.
How long does it take to gain an inch on your arms?
Beginners can potentially gain half an inch per month for the first few months, meaning two months for a full inch. Intermediate lifters typically need three to six months to gain half an inch.
Advanced lifters might take a year or more to add a quarter inch.
These timelines assume consistent training, proper nutrition, and adequate recovery.
Should I measure my arms flexed or relaxed?
Measure your biceps flexed at the peak contraction to capture most size. Measure your forearms relaxed with your arm hanging naturally.
Consistency matters more than the specific method, so choose one approach and stick with it for all future measurements to ensure valid comparisons.
Why are my arm measurements not increasing?
Measurements plateau for several reasons: not enough training volume, inadequate nutrition for growth, poor recovery, or simply being in an advanced stage where growth naturally slows. Review your training logs to ensure progressive overload, verify you’re eating enough calories and protein, and give adaptations enough time to manifest before changing your approach.
How do I fix uneven arm development?
Start all unilateral exercises with your weaker arm and match that exact rep count with your stronger arm. Use dumbbells and cables as opposed to barbells to prevent compensation.
Measure both arms separately each month to track whether the gap is narrowing.
Most importantly, avoid adding extra sets to your weaker side, which often backfires by exceeding recovery capacity.
What should I track besides arm measurements?
Track body weight, training volume, exercise performance, and take monthly progress photos. Log specific exercises, sets, reps, weights, and Rate of Perceived Exertion for each workout.
Monitor sleep quality and subjective recovery.
This comprehensive data reveals what drives your personal growth and when adjustments are needed.
Key Takeaways
Measurement consistency matters infinitely more than measurement frequency. Standardize your technique, timing, and conditions completely.
Track arm measurements alongside body weight and waist circumference to distinguish muscle gain from overall weight changes.
Maintain detailed training logs capturing volume, intensity, and exercise selection to identify what drives your personal growth patterns.
Use progress photos monthly to document visual improvements that circumference measurements miss entirely. Monitor both arms separately to identify and fix asymmetries before they become problematic.
Performance metrics like strength increases and reduced rest periods forecast size gains weeks before measurements show changes.
Accept that normal daily fluctuations of a quarter to half inch represent meaningless noise requiring monthly averaging to see true trends. Review your accumulated data every four weeks to make evidence-based training adjustments as opposed to random changes based on feeling.
Everlywell Cholesterol & Lipids Test – At-Home Screening
Want to monitor your heart health and lipid levels without a lab visit? This at-home test provides a comprehensive look at key cholesterol markers so you can better understand your cardiovascular risk.
- ✔ Measures total cholesterol, LDL, HDL, and triglycerides
- ✔ CLIA-certified lab analysis
- ✔ Physician-reviewed, easy-to-read results
- ✔ Simple finger-prick blood sample from home
FSA/HSA eligible • Test from home • Personalized cardiovascular insights
Find out our Recommended Protein Powders for Women to Crush Their Fitness Goals; visit: https://www.vitalwomenwellness.com/best-protein-powders-for-women-to-crush-their-new-year-fitness-goals/
Disclaimer
The information contained in this post is for general information purposes only. The information is provided by How to Track Your Arm Workout Progress and while we endeavor to keep the information up to date and correct, we make no representations or warranties of any kind, express or implied, about the completeness, accuracy, reliability, suitability or availability with respect to the website or the information, products, services, or related graphics contained on the post for any purpose.